Love working with the Flatsome native UX Builder, but you would like to automate some of the work you do? Or just enforce same styles for elements?
That’s great! Flatsome theme allows you using shortcodes for quick development of the custom features. You can use the do_shortcode function or add the php created shortcodes as part of your content. Prefill the galleries, create accordions or add custom headers to specified archives or posts.
So let’s get started!
Example: dynamic image gallery for posts
Let’s say you want your posts to have an image gallery at the end of the content. Of course you can make it by using UX Builder and placing the gallery element at the end of the post. But to have consistent style – you will always need to use same settings. What happens if you want to adjust the style of those galleries – let’s say add shadow effect or change the image ratio – you will have to manually edit each posts separately.
So in our example we will:
- Add custom post fields for our posts – image gallery
- Use UX Builder to define the gallery style
- Render the gallery using Flatsome UX Builder element shortcode
- Attach it to the post content at the end of the post
Prepare the child theme
You can use the code snippets to fire your custom actions, but I strongly recommend using the child theme for your custom features. In the child theme folder locate the functions.php – it’s the place we will put the custom code. If it gets to cluttered – you can always push some of the functions to different files and load the from the functions.php the file with specific functions – for example blog-functions.php.
Add gallery custom field
As soon as we have the child theme ready – we will add the custom post fields. I am using Meta Box plugin for this kind of features, but you can use ACF, Pods or Toolset.
Our goal is to create easy to edit – image gallery.
With Meta Box you can quickly prepare the field and add the code to your functions php. You can still just use the user interface, but that will make it harder moving the code between projects or different environments.
Our field definition looks like this:
// Create gallery for posts
add_filter('rwmb_meta_boxes', 'blog_gallery_images_fields');

function blog_gallery_images_fields($meta_boxes)
{
    $prefix = '';

    $meta_boxes[] = [
        'title' => __('Inspiration gallery', 'blog_gallery_images'),
        'id' => 'inspiration-gallery',
        'fields' => [
            [
                'name' => __('Image gallery', 'blog_gallery_images'),
                'id' => $prefix . 'image_gallery',
                'type' => 'image_advanced',
                'image_size' => 'medium',
            ],
        ],
    ];

    return $meta_boxes;
}
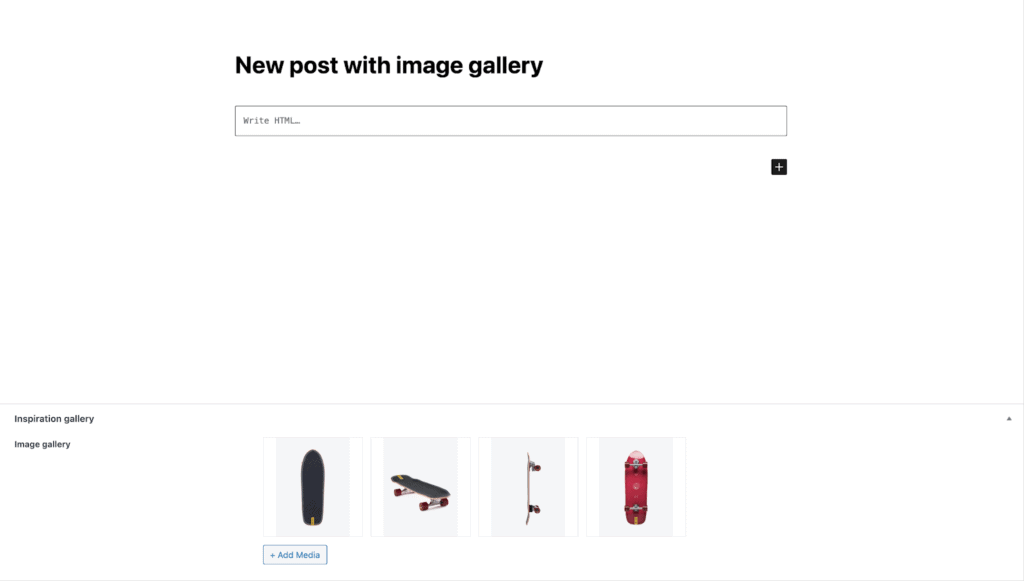
This is how it will look like when we will be adding new post (I’ve already set 4 images):
Now as we do have defined the custom field that will serve as our source for the images we can proceed to the next step.
Let’s design image gallery in UX Builder
Use the UX block element to design our gallery – you can also use post/page to create element, but using UX block will simply save our gallery as shortcode after you exit the UX builder. So let’s say we create something like this in an empty post:

Style it accordingly an use dummy images for now:

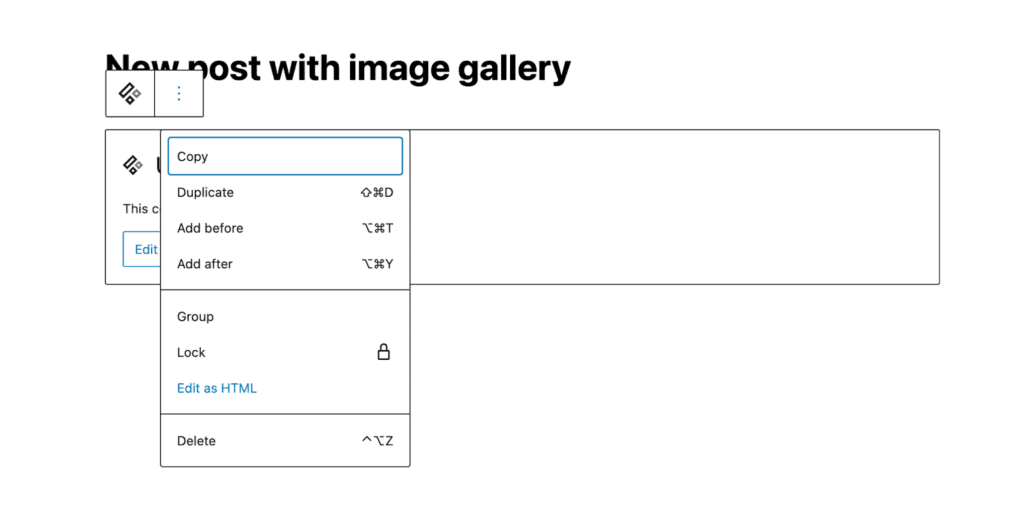
Save and exit to default WordPress editor. If you used post/page – click on three dots and use Edit as html to get the Flatsome shortcode for your element.
It will look something like this:
[ux_gallery ids="100,101" style="normal" columns="2" depth_hover="2" animate="fadeInUp" image_height="100%" image_hover="zoom"]
Let’s break it down to most important parts:
- ux_gallery – the type of our element
- ids – the ids of our images
- style, columns, etc. – the visual style of the elements
So as we have the parts we need – we will try to create a php snippet that will fill the ids – using the values from our custom field gallery.
Render the gallery shortocode with php
Let’s look at sample use for our custom gallery, supplied by Meta Box plugin:
// Display images with links to the full-size versions (for lightbox effects):
$images = rwmb_meta( 'image_gallery', [ 'size' => 'thumbnail' ] );
?>
<h3>Uploaded images</h3>
<ul>
	<?php foreach ( $images as $image ) : ?>
		<li><a href="<?= $image['full_url'] ?>"><img src="<?= $image['url']; ?>"></a></li>
	<?php endforeach ?>
</ul>
In our case – we will get the values from the image_gallery – but we do not have to render full elements as h3 or ul. We need the ids, to fill and modify our shortcode.
So let’s get the images from our custom field and create the list of ids:
// Fetch images from the metabox
$images = rwmb_meta('image_gallery');

// Extract IDs from images array
$ids = array_map(function ($image) {
        return $image['ID'];
    }, $images);

// Create a comma-separated list of IDs
$ids_string = implode(',', $ids);
We will also make the gallery a bit more responsive by adjusting the columns depending on the images quantity.
We will use one column for posts with just one image and three columns if we have three or nine images. Otherwise we will use 2 columns:
// Determine the number of columns based on the count of images
$columns = 2; // Default number of columns
$image_count = count($ids);
if ($image_count === 1) {
        $columns = 1;
} elseif (in_array($image_count, [3, 9])) {
        $columns = 3;
}
Now we will use add_filter for $the_content of the post and add our customized shortcode at its end. The complete function will look like this:
function add_image_gallery_at_post_end($content)
{
    // Fetch images from the metabox
    $images = rwmb_meta('image_gallery');


    // Check if there are any images
    if (!$images) {
        return $content;
    }

    // Extract IDs from images array
    $ids = array_map(function ($image) {
        return $image['ID'];
    }, $images);

    // Create a comma-separated list of IDs
    $ids_string = implode(',', $ids);

    // Determine the number of columns based on the count of images
    $columns = 2; // Default number of columns
    $image_count = count($ids);
    if ($image_count === 1) {
        $columns = 1;
    } elseif (in_array($image_count, [3, 9])) {
        $columns = 3;
    }

    // Construct the shortcode with dynamic IDs and columns
    $shortcode = '[ux_gallery ids="' . $ids_string . '" style="normal" columns="' . $columns . '" depth_hover="2" animate="fadeInUp" image_height="100%" image_hover="zoom"]';

    // Append the shortcode to the content
    $content .= $shortcode;

    return $content;
}

// Add the filter to the_content
add_filter('the_content', 'add_image_gallery_at_post_end');
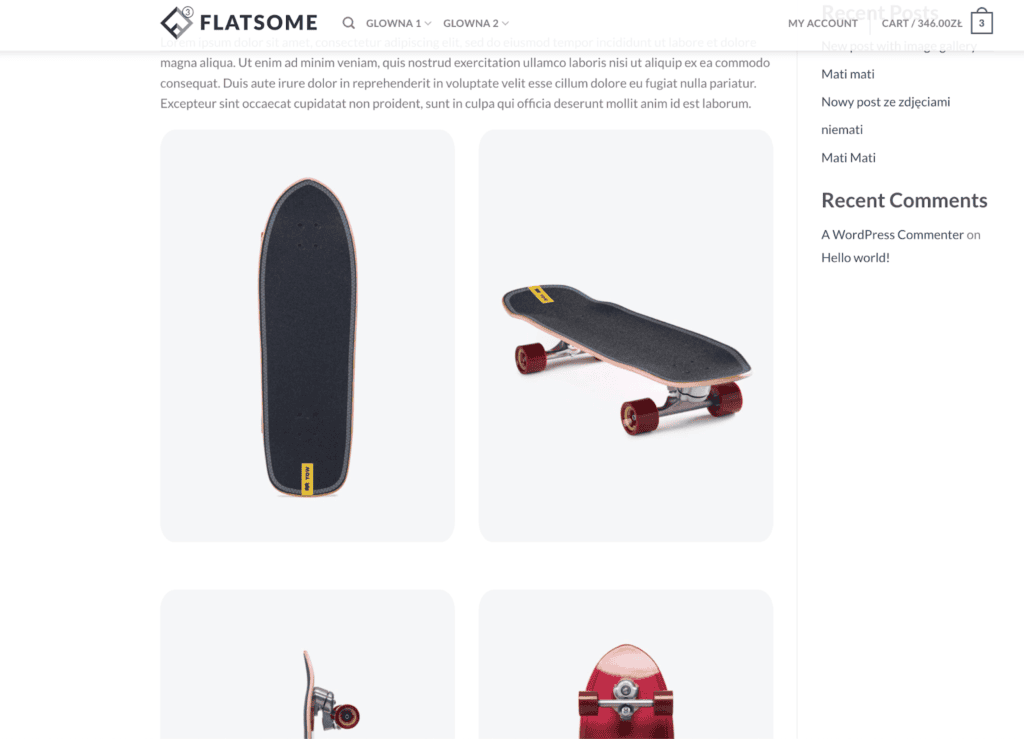
So after we have this whole code working in our functions.php file we should get something like this on our frontend:
With a similar approach you can quickly create your own custom parts like: FAQ sections, custom archive headers, certificates gallery etc.
Use the UX builder for general styling and to include elements that would otherwise much more coding from you side – like galleries, product lists or banners. Then utilize simple php functions to recreate the shortcode, but using your elements – preferably saved as custom fields.
If you need help on creating custom functions for your Flatsome shop – please contact me.